Measuring the terrain
To check how the ultrasonic sensor works at different angles according to the terrain, to define the maximum slope to still gain sensible results.
To make several diverse terrains from cardboard or items we have close at hand and measure them using a robot. Terrains for linear measuring and those for circular measuring need to be made. The measurements will be displayed in a graph.
Preparing For This Tutorial:
The LEGO Mindstorm EV3 Robot that coincides with this tutorial comes from building specific sections found in the LEGO Mindstorm Education Core Set building instructions. You will need to build the main body for the robot (I’ll refer to as the Base Unit), plus an ultrasonic sensor.
Time constraints:
The time needed for the activity is 90-135 minutes.
Exercise
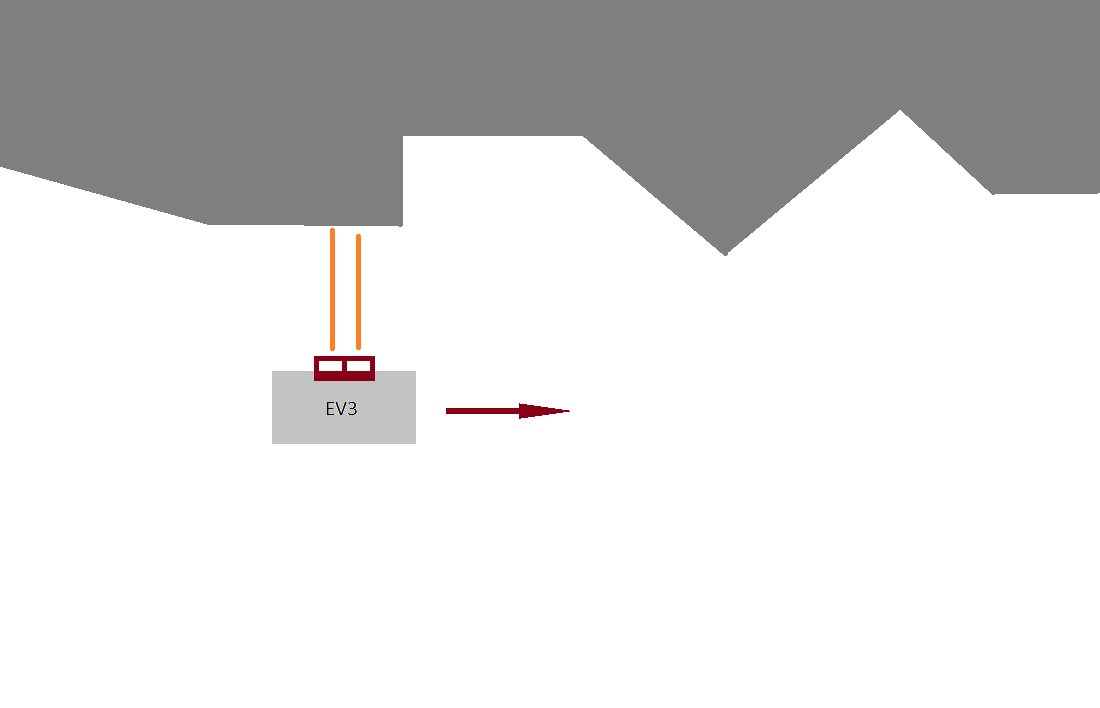
Check the functioning of the sensor at different terrain angles. We can predict that at bigger angles the measurements slowly become useless as the sensor does not obtain the rebound. Place the flat plank at different angles towards the sensor. The robot should drive and measure approximately one meter in length. It makes the measurement, drives on a few centimetres and makes another measurement, etc., so that there are at least 30 measurements for each plank position. To ensure better accuracy each measurement should be the average of ten measurements from the same position. Every time increase the plank slope by a few degrees up to the point when the measurements are useless and not sensible anymore.
What is the maximal plank slope that still gives sensible results?
Several diverse terrains need to be made to be measured by our robot. We can use items that we have close at hand, such as cardboard, polystyrene, smaller furniture parts. The sensor does not detect at a distance longer than 255 cm, which you should take into account when making the terrain. The length of the measured terrain should be at least 2 meters and the measurement should be made every few centimetres.
Scan the terrain linearly and circularly, save the data which will later be displayed.
Illustrate the measured distances in a graph and compare them with real values.
Theory
An ultrasonic sensor is an electronic device that can emit and receive ultrasound. The sensor emits an ultrasound pulse and records how much time it takes for a pulse to deflect from the obstacle and come back to the sensor. The time can be converted into distance and we get a simple distance meter. Our mindstorm lego robot can do that automatically and it can also show the distance in centimetres or inches. In this exercise the ultrasonic sensor will serve as a tool for perceiving the environment.
The terrain can be scanned:
linearly, the robot drives along the terrain and measures the distances perpendicular to the direction of motion.
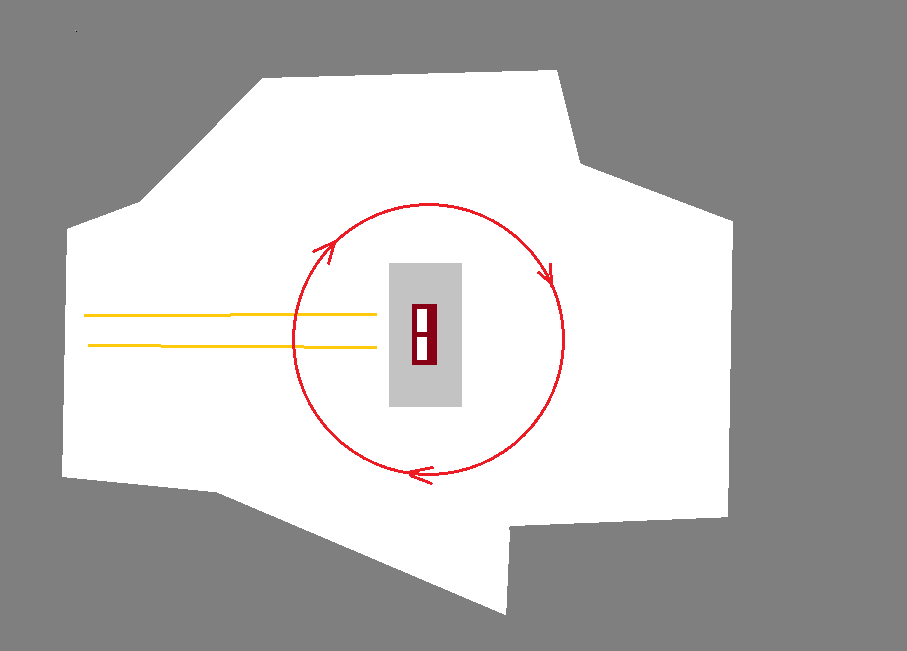
circularly, the robot spins on the spot and measures the distance from the terrain
Illustrate the measured distances in a graph and compare them with real values.
Short help on programming
Commands/functions needed for the exercise
The first three lines import the libraries for the ultrasonic sensor and for the engine power. The fourth line imports the sleep() function, which freezes the programme for the entered time.
#!/usr/bin/env python3

from ev3dev2.sensor.lego import UltrasonicSensor

from ev3dev2.motor import LargeMotor, OUTPUT_A, OUTPUT_B,OUTPUT_C, SpeedPercent, MoveTank

from time import sleep
Create objects for the robot move and an ultrasonic sensor.
#!/usr/bin/env python3

tank_drive = MoveTank(OUTPUT_B, OUTPUT_C)

us=UltrasonicSensor()
The first property states the distance to the obstacle in centimetres, while the other one states the distance in inches. In both cases the distance is accurate to the tenth of the centimetre or inch.
#!/usr/bin/env python3

us.distance_centimeters

us.distance_inches

print(us.distance_centimeters)
We create a list of distances. The measured distance is saved in this list.
#!/usr/bin/env python3

distances=[]

distances.append(us.distance_centimetres)
An example of a code for linear measurement:
#!/usr/bin/env python3

from ev3dev2.sensor.lego import UltrasonicSensor

from ev3dev2.motor import LargeMotor, OUTPUT_A, OUTPUT_B,OUTPUT_C, SpeedPercent, MoveTank

from time import sleep

us=UltrasonicSensor()

tank_drive = MoveTank(OUTPUT_B, OUTPUT_C)

nofmeas=40

scanlength=200 #cm

step=scanlength/nofmeas

distances=[]

counter=0

def forward(length): #define the function for a move forward for specific length

  tank_drive.on_for_rotations(SpeedPercent(30), SpeedPercent(30), length/wheel)

  while(counter<nofmeas): #loop until counter reaches the number of measurements(40)

    sum=0 # save 10 successive measurements in this variable

    for i in range(10): #for better accuracy take the average of 10 measurements

      dist=us.distance_centimeters

      sum+=dist

      distances.append(sum/10) #save the average of 10 measurements to the list

    print(distances[counter]) #print the measurement

    sleep(0.01)

    forward(step) #robot moves forward one step

    counter+=1 #increase counter by 1
For circular measuring:
write a similar function for the robot rotation at a specific angle -> turn(360/nofmeas).
the function forward(step) in the while loop needs to be replaced by the function turn(360/nofmeas).
We would like to show the obtained results graphically. In Python there is the plotting library Matplotlib, which can generate graphs, functions, etc. Each measurement can be displayed as a point on the graph, using the x and y coordinates. As there are many points, we use 2 lists. The first one is used to save x coordinates of our points (linear moves along the terrain, e.g. from 0 – 200 cm) and the second list is used to save y coordinates (the measured distances to the terrain / obstacles).
Example:
import matplotlib.pyplot as plt #import the library