The Magnitude of Static Friction
Students learn - better Newton’s second law of motion by experimenting with moving the body down an inclined plane. Friction force is being measured and the coefficient of static friction is determined. For that purpose, a robot is being used alongside a gyro and color sensor from Lego EV3 and a light sensor from Vernier.
Prerequisite
What students should know before:
Newton’s second law
Smoothly accelerated straight line motion in two dimensions
Trigonometric functions and vectors, projection of vectors
How the gyro sensor works and its application
Time constraints:
starting from 45 min - single lesson
up to 225 min - five lessons (in a row)
Preparing For This Tutorial:
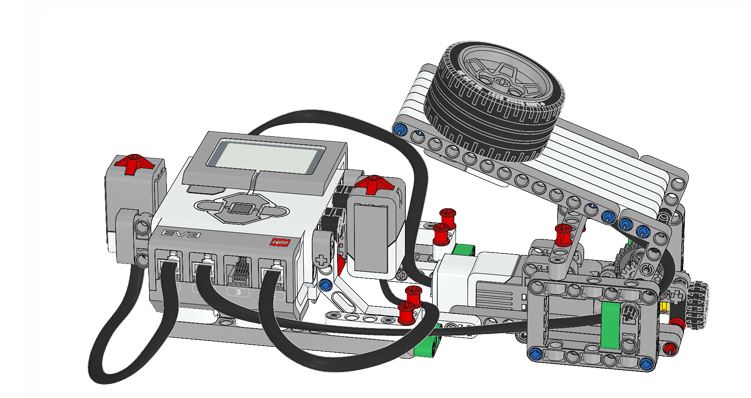
The LEGO Mindstorm EV3 Robot that coincides with this tutorial comes from building specific sections found in the LEGO® MINDSTORMS® Education EV3 Software (Science ->Force and Motions ->Friction).
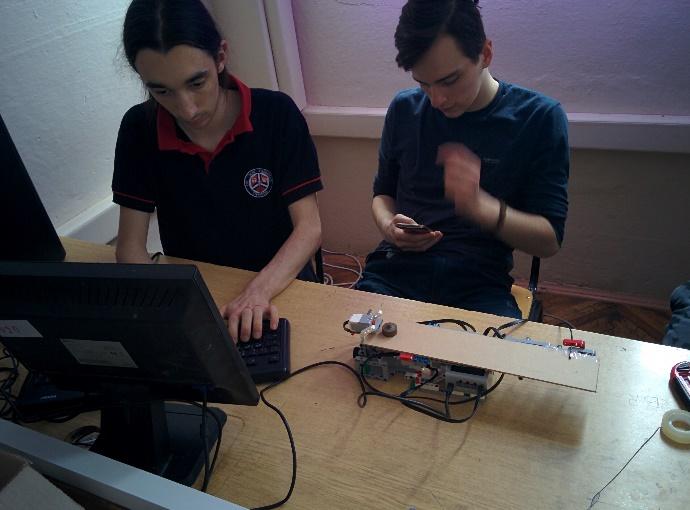
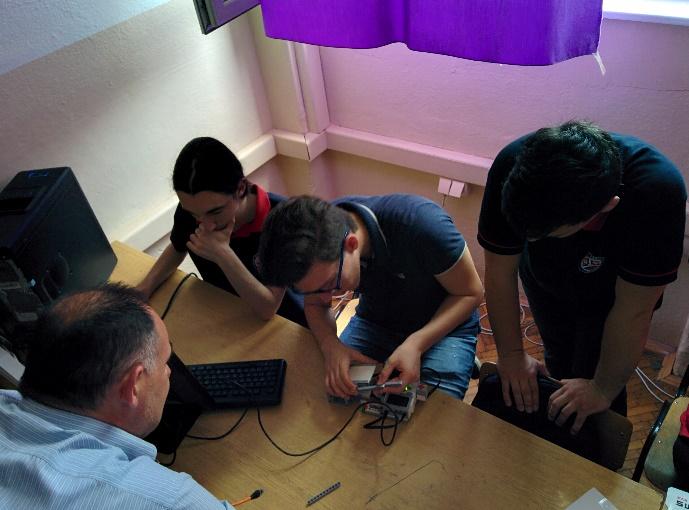
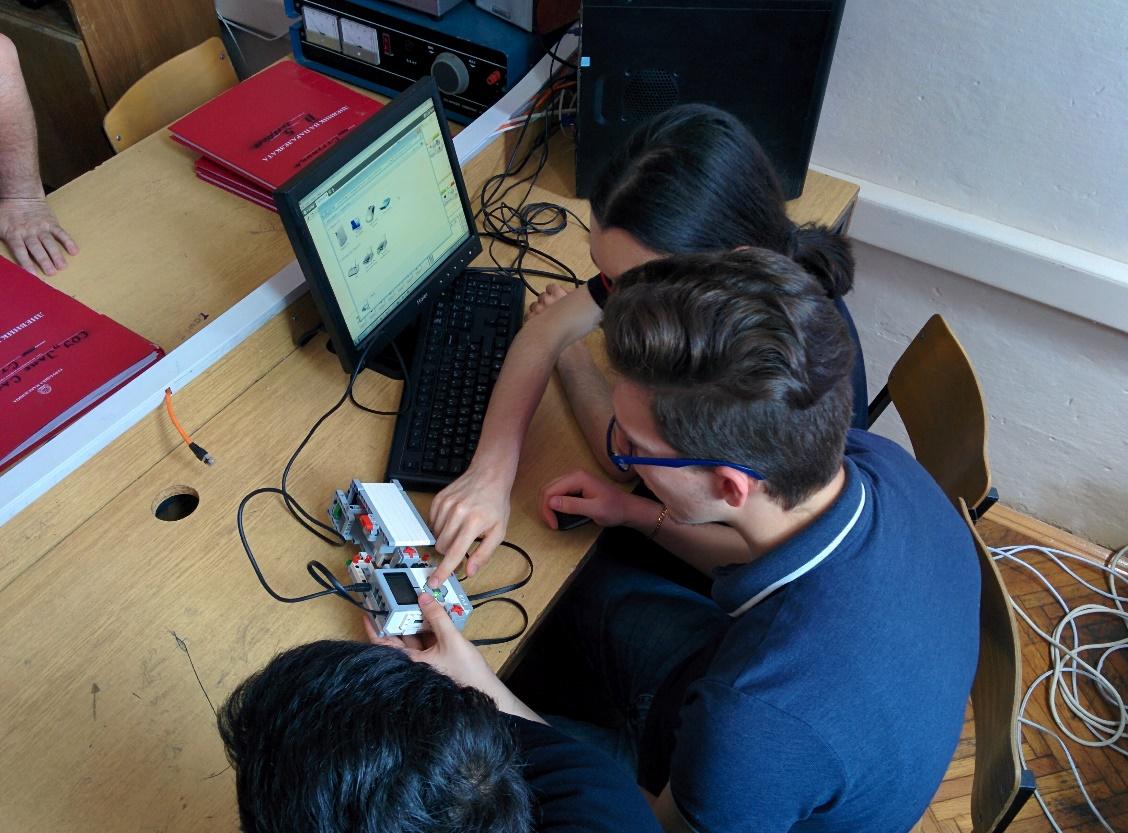
First the brick is connected to the computer, then attach the motor and make a ramp as shown in Figure 1. The students continue extending the ramp (Figure 2), connect the sensors and then put some pieces of cardboard over the ramp (Figure 3).
Effects
Physics–Students advance their knowledge of Newton’s laws. They study the friction forces. Get acquainted with the static and kinematic coefficient of sodium. Get practical experience from conducting an experiment and analyzing it.
Mathematical Physics - Students are introduced to trigonometric functions and vector analysis.
Computer science - These lessons told you how to create the program using gyro sensor and color sensor.
Exercise
Physics:
Prepare two experimental exercises, one classic with the use of a stopper, a length measurement tool, a inclined plane, a slip body, a dynamometer. The second experimental setting is with the Lego Robot EV3 and the use of various sensors. The students make the two exercises in parallel. Make a comparison of the two experiments.
Computer science:
Create a program that calculates the static and kinetic friction between two surfaces.
Detailed tasks and questions
Are students familiar with Newton’s Second law and where does it apply in everyday life?
What does the friction coefficient of a body sliding on substrate depend on?
How is the friction coefficient calculated for a given surface?
If the coefficient of friction between a 35 kg box and the substrate is 0.30, how much horizontal force is needed to move the box to the left at constant speed?
How is the friction coefficient calculated for a given surface?
Create a program that calculates static and kinetic friction between two surfaces of a body sliding along an inclined plane.
Write a program that will print the angle of the gyro sensor while lifting the ramp, thus accurately calibrating the sensor. If the angle is greater than 60 degrees the ramp stops lifting.
Create a program that would lift the robot’s ramp, and the gyro sensor to calculate at what angle the body began to move and passed the first light sensor.
Add a second sensor (color sensor) to register when the body has reached the end of the ramp. This sensor emits red light and when it detects the reflected light from the body it marks the time the body has reached the end of the ramp.
Add a counter that will calculate how long the experiment lasted and the difference between when the body started moving (the time recorded by the first light sensor) and when it reached the end of the ramp (the time of the second sensor, the color sensor).
Using the data from the previous steps in the program, add the equations to calculate the static and dynamic friction coefficients.
Make multiple measurements with different objects (objects of different mass and shape) that move across different surfaces (e.g. wood, aluminum foil, glass, etc.) and compare the results of the measurements.
Example solution
Part 1
Create a program that will print out the value of angle from the gyro sensor while the ramp rises, so we can be sure about the precision of the sensor.
Physics:
Get to know the physical principle of the gyro sensor operation.
Computer science
This is a code that prints out the angle while the ramp rises, but if the angle is bigger than 60 degrees the motor will stop and it will exit the loop. The code in the commented region “Gyro Sensor” calculates the difference in angle between the loop iterations, so no matter what is the start output angle of the gyro sensor, it will always start with an angle of 0 degrees.
1.  #!/usr/bin/env python3

2.  from ev3dev.ev3 import *

3.  import time

4.  import math

5.  import os

6.

7.  ### ------ Setting up the motors and sensors -------

8.  os.system("clear")

9.  print("Connecting the IO ports...")

10. main_motor = MediumMotor("outA")

11. gyro_sensor = GyroSensor()

12. gyro_sensor.mode = 'GYRO-ANG'

13. ### -----------------------------------------------

14.

15. angle = 0

16. prev = 0 *# this is the previous gyro value*

17. motor_working = True

18. firsttime = True

19. while True:

20.       print("Angle:", angle)

21.

22. if angle > 60 and not firsttime:

23.       main_motor.stop()

24. motor_working = False

25. break

26.
27. if motor_working:

28. main_motor.run_forever(speed_sp = -100)

29.
30. # ----------- Gyro Sensor -------------

31.         gyro_value = gyro_sensor.value()

32.         currValue = gyro_value – prev

33.
34.         if not firsttime:

35.             angle += abs(currValue)

36.
37.         prev = gyro_value

38. # -------------------------------------

39. firsttime = False
Summary
In this part, we have learned how to configure the gyro sensor and read the angle accurately.
Part 2
Physics
Get to know the physical principle of the light sensor operation.
Computer science
In this section, we add a handling for the “start sensor” - it’s a light sensor from Vernier that is receiving constant light from an LED source and when the object crosses the path, it blocks some of the light from the source, that way the code will notice a lower input value of the light sensor. In another sketch, we have derived that when the object blocks the constant light source, the value drops well below 1000.
40. #!/usr/bin/env python3

41. from ev3dev.ev3 import *

42. import time

43. import math

44. import os

45. Create a program that will cause the robot's ramp to rise up and the
    gyro sensor to calculate at which angle the object has crossed the
    first light sensor.

46.
47.

48. ### ------ Setting up the motors and sensors -------

49. os.system("clear")

50. print("Connecting the IO ports...")

51. main_motor = MediumMotor("outA")

52. gyro_sensor = GyroSensor()

53. gyro_sensor.mode = 'GYRO-ANG'

54. obj_start_sensor = Sensor("in1")

55. ### -----------------------------------------------

56.
57. angle = 0

58. prev = 0 *# this is the previous gyro value*

59. motor_working = True

60. firsttime = True

61. while True:

62. # ----------- Start Sensor Handling ---------------

63.         if obj_start_sensor.value() < **1000**: *# assumed threshold
    value*

64.             print("Sensor Threshold Hit!")

65.             main_motor.stop()

66.             motor_working = False

67.            print("Angle in which it fell down", angle)

68.

69. if motor_working:

70.             main_motor.run_forever(speed_sp = -100)

71. # --------------------------------------------------

72.
73. # ----------- Gyro Sensor -------------

74.         gyro_value = gyro_sensor.value()

75.         currValue = gyro_value – prev

76.
77.         if not firsttime:

78.             angle += abs(currValue)

79.
80.         prev = gyro_value

81. # -------------------------------------

82. firsttime = False
Summary
In this part, we have set up the first light sensor and now we are able to detect when the object starts moving.
Part 3
Adding the second so-called fall sensor to detect when the object has reached the end of the ramp.
Physics
Students are introduced to the physical principles of the color sensor.
Computer science
To calculate the time it takes the object to fall down from the starting static position, we’ll need another sensor to notice when the object has reached the bottom of the ramp (we called it ‘fall sensor’). This will allow us to calculate the time difference between the two sensors in the next code example. The same as previously, we are just setting up and testing the fall sensor and the output values it gives. Because this sensor is a type of Color Sensor, we have few modes to explore and to choose from. Because of the low dynamic range of the sensor for detecting the ambient light intensity, we chose the COL-REFLECT mode which emits a red light, and senses the reflected red light off of the objects in front. In the code below, we are using the reflected_light_intensity variable.
1.  #!/usr/bin/env python3

2.  from ev3dev.ev3 import *

3.  import time

4.  import math

5.  import os

6.

7.  ### ------ Setting up the motors and sensors -------

8.  os.system("clear")

9.  print("Connecting the IO ports...")

10. main_motor = MediumMotor("outA")

11. gyro_sensor = GyroSensor()

12. gyro_sensor.mode = 'GYRO-ANG'

13. obj_start_sensor = Sensor("in1")

14. obj_fall_sensor = ColorSensor("in3")

15. obj_fall_sensor.mode = 'COL-REFLECT'

16. ### -----------------------------------------------

17.
18. angle = 0

19. prev = 0 *# this is the previous gyro value*

20. motor_working = True

21. firsttime = True

22. speed = 100

23. while True:

24. # ----------- Start Sensor Handling ---------------

25.         if obj_start_sensor.value() < 1000: # assumed threshold value

26.             print("Sensor Threshold Hit!")

27.             main_motor.stop()

28.             motor_working = False

29.

30. if motor_working:

31.             main_motor.run_forever(speed_sp = -speed)

32. # --------------------------------------------------

33.
34. # ----------- Gyro Sensor -------------

35.         gyro_value = gyro_sensor.value()

36.         currValue = gyro_value – prev

37.
38.         if not firsttime:

39.             angle += abs(currValue)

40.
41.         prev = gyro_value

42. # -------------------------------------

43.
44. # ----------- End Sensor Handling ---------------

45. if obj_fall_sensor.reflected_light_intensity > 1: *#calculated threshold*

      print(" ----- DONE ----- ")

      print("Angle at which it fell down", angle)

46. time.sleep(10)

    input("Press any key to continue!")

47. break

48. # --------------------------------------------------

49.
50. firsttime = False
Part 4
In this step, we’ll add a timer counter which will keep track of the time past during the experiment and it will allow us to calculate the time difference mentioned above.
Computer science
This counter is not a real in-processor timer, it’s rather just a variable that will keep the ‘prev time’ of the experiment (i.e. the exact time relative to the processor’s clock when the experiment started). Also, we have a variable that is called ‘start time’ which will remember when the object started moving, so we can further calculate the time difference between the sensors.
1.  #!/usr/bin/env python3

2.  from ev3dev.ev3 import *

3.  import time

4.  import math

5.  import os

6.

7.  ### ------ Setting up the motors and sensors -------

8.  os.system("clear")

9.  print ("Connecting the IO ports...")

10. main_motor = MediumMotor("outA")

11. gyro_sensor = GyroSensor()

12. gyro_sensor.mode = 'GYRO-ANG'

13. ramp_level = TouchSensor("in4")

14. obj_start_sensor = Sensor("in1")

15. obj_fall_sensor = ColorSensor("in3")

16. obj_fall_sensor.mode = 'COL-REFLECT'

17. ### ------------------------------------------------

18.

19. print ("Starting the experiment!")

20.

21. prev = 0

22. angle = 0

23. speed = 100

24. firsttime = True

25. direction = -1

26. startTime = None

27. prevTime = time.time()

28. timeCounter = 0

29. motor_working = True

30.

31. while True:

32.         # ----------- Time Handling ---------------

33.         currTime = time.time()

34.         timeCounter += (currTime - prevTime)

35.         prevTime = currTime

36.         # -----------------------------------------

37.

38.         # ----------- Start Sensor Handling ---------------

39.         if obj_start_sensor.value() < 1000:

40.             print ("Sensor Threshold Hit!")

41.             main_motor.stop()

42.             motor_working = False

43.             startTime = timeCounter

44.

45.         if motor_working:

46.             main_motor.run_forever(speed_sp = -speed)

47.         # --------------------------------------------------

48.

49.         # ----------- Gyro Sensor -------------

50.         gyro_value = gyro_sensor.value()

51.         currValue = gyro_value - prev

52.

53.         if not firsttime:

54.             angle += abs(currValue)

55.

56.         prev = gyro_value

57.         # -------------------------------------

58.

59.         # ----------- End Sensor Handling ---------------

60.         if obj_fall_sensor.reflected_light_intensity > 1:

61.             main_motor.stop()

62.             print (" ----- DONE ----- ")

63.             print ("Time Counter since the experiment started:", timeCounter)

64.             print ("Start Time:", startTime)

65.             print ("Time took to fall down:", timeCounter - startTime)

66.             print ("Angle at which it fell down", angle)

67.

68.             time.sleep(10)

69.             input("Press any key to continue!")

70.             break

71.

72.         # --------------------------------------------------

73.

74.         firsttime = False
Part 5
This is the final code where we have added the calculations from physics and structured everything in different functions (our code structure follows that of the popular microcontrollers, such as the Arduino, where we have a setup() and a loop() function. The setup function runs only ones, while the loop function runs as long as the program is alive). Also, we have added calibration functions for the ramp and the light sensor.
Physics
Calculating the static and kinetic friction between two surfaces.
Computer science
1.   #!/usr/bin/env python3

2.   from ev3dev.ev3 import *

3.   import time

4.   import math

5.   import os

6.

7.   light_cal = 0

8.   light_cal_fall_min = 1

9.   light_cal_threshold = 1000

10.

11.  loop_on = True

12.

13.  ### ------ Setting up the motors and sensors -------

14.  os.system("clear")

15.  print ("Connecting the IO ports...")

16.  main_motor = MediumMotor("outA")

17.  gyro_sensor = GyroSensor()

18.  gyro_sensor.mode = 'GYRO-ANG'

19.  ramp_level = TouchSensor("in4")

20.  obj_start_sensor = Sensor("in1")

21.  obj_fall_sensor = ColorSensor("in3")

22.  obj_fall_sensor.mode = 'COL-REFLECT'

23.  ### ------------------------------------------------

24.

25.  def setup():

26.      print ("BOOTING...")

27.      print ("Make sure that your robot is leveled!")

28.      input("If your robot is leveled, press any key to continue!")

29.

30.      assert main_motor.connected

31.      assert gyro_sensor.connected

32.      assert ramp_level.connected

33.      assert obj_start_sensor.connected

34.      assert obj_fall_sensor.connected

35.

36.      print ("Dumping the Gyro Sensor first time data...");

37.      dump = gyro_sensor.value()

38.      time.sleep(1)

39.

40.      while loop_on:

41.          loop()

42.

43.  def calibrateRamp():

44.      print ("Calibrating the ramp...")

45.      main_motor.run_forever(speed_sp = 100)

46.      while True:

47.          if ramp_level.value():

48.              print ("Successfully calibrated the ramp!")

49.              main_motor.stop()

50.              break

51.      time.sleep(1)

52.

53.  def calibrateLight():

54.      input("Press any key if the light source is set up correctly...")

55.      global light_cal

56.      light_cal = obj_start_sensor.value()

57.      print ("Light sensor threshold value set to", light_cal - light_cal_threshold)

58.

59.  def loop():

60.      calibrateRamp()

61.      calibrateLight()

62.      input("=> Press any key to begin the experiment!")

63.      experiment()

64.

65.  def experiment():

66.      print ("Starting the experiment!")

67.

68.      prev = 0

69.      angle = 0

70.      speed = 100

71.      firsttime = True

72.      working = True

73.      direction = -1

74.      startTime = None

75.      prevTime = time.time()

76.      timeCounter = 0

77.      motor_working = True

78.

79.      while working:

80.          # ----------- Time Handling ---------------

81.          currTime = time.time()

82.          timeCounter += (currTime - prevTime)

83.          prevTime = currTime

84.          # -----------------------------------------

85.

86.          # ----------- Start Sensor Handling ---------------

87.          if obj_start_sensor.value() < light_cal - light_cal_threshold:

88.              print ("Sensor Threshold Hit!")

89.              main_motor.stop()

90.              motor_working = False

91.              startTime = timeCounter

92.

93.          if motor_working:

94.              main_motor.run_forever(speed_sp = -speed)

95.          # --------------------------------------------------

96.

97.          # ----------- Gyro Sensor -------------

98.          gyro_value = gyro_sensor.value()

99.          currValue = gyro_value - prev

100.

101.         if not firsttime:

102.             angle += abs(currValue)

103.

104.         prev = gyro_value

105.         # -------------------------------------

106.

107.         if angle >= 60 and not firsttime:

108.             main_motor.stop()

109.             working = False

110.

111.         # ----------- End Sensor Handling ---------------

112.
       if obj_fall_sensor.reflected_light_intensity > light_cal_fall_min:

113.             main_motor.stop()

114.             print (" ----- DONE ----- ")

115.             print ("Time Counter since the experiment started:", timeCounter)

116.             print ("Start Time:", startTime)

117.             print ("Time took to fall down:", timeCounter - startTime)

118.             print ("Angle at which it fell down", angle)

119.

120.             # ------------ Calculations ---------------

121.             t = timeCounter - startTime

122.             s = 0.3

123.             a = 2*s/(t*t)

124.             g = 9.81

125.             ms = math.tan(math.radians(angle))

126.             m = ms - (a / (g \* math.cos(math.radians(angle))))

127.

128.             print ("The static coefficient of friction is:", ms)

129.             print ("The kinetic coefficient of friction is:", m)

130.             # -----------------------------------------

131.

132.             time.sleep(10)

133.             input("Press any key to continue!")

134.             break

135.

136.         # --------------------------------------------------

137.

138.         firsttime = False

139.

140. setup()
Summary
We have made a very precise concept for calculating the static and kinetic friction between any two surfaces using the EV3 LEGO MINDSTORM.